
Revamp your kitchen without breaking the bank using creative, cost-effective upgrades like fresh paint, new hardware, and smart storage solutions. With a little planning and DIY effort, you can achieve a high-end look for under $500.
Your kitchen is the heart of your home—the place where meals are made, memories are shared, and life happens. But let’s be honest: not everyone has the budget for a full-scale renovation with custom cabinets, quartz countertops, and high-end appliances. The good news? You don’t need a massive budget to give your kitchen a fresh, modern look. With a little creativity, some elbow grease, and smart shopping, you can completely transform your space for a fraction of the cost.
A budget-friendly kitchen makeover isn’t about cutting corners—it’s about making strategic upgrades that deliver the biggest visual impact. Think of it like giving your kitchen a wardrobe refresh instead of buying a whole new closet. You’re not starting from scratch; you’re reimagining what you already have. Whether you’re a renter looking for temporary fixes or a homeowner wanting to increase your property’s appeal before selling, these ideas are practical, stylish, and surprisingly affordable.
In this guide, we’ll walk you through the best budget-friendly kitchen makeover ideas that deliver maximum style for minimal spend. From quick paint jobs to clever storage hacks, you’ll discover how small changes can make a big difference. And the best part? Most of these projects can be completed in a weekend or less, with tools you likely already have at home.
Key Takeaways
- Paint is your best friend: A fresh coat of paint on cabinets, walls, or even the ceiling can dramatically transform your kitchen’s look for under $100.
- Update cabinet hardware: Swapping out old knobs and pulls for modern finishes like brushed gold or matte black adds instant style for minimal cost.
- Use peel-and-stick tiles: Affordable and renter-friendly, these tiles offer a stylish backsplash upgrade without permanent changes or high installation costs.
- Maximize lighting: Layered lighting with under-cabinet strips and stylish pendant lights enhances both function and ambiance.
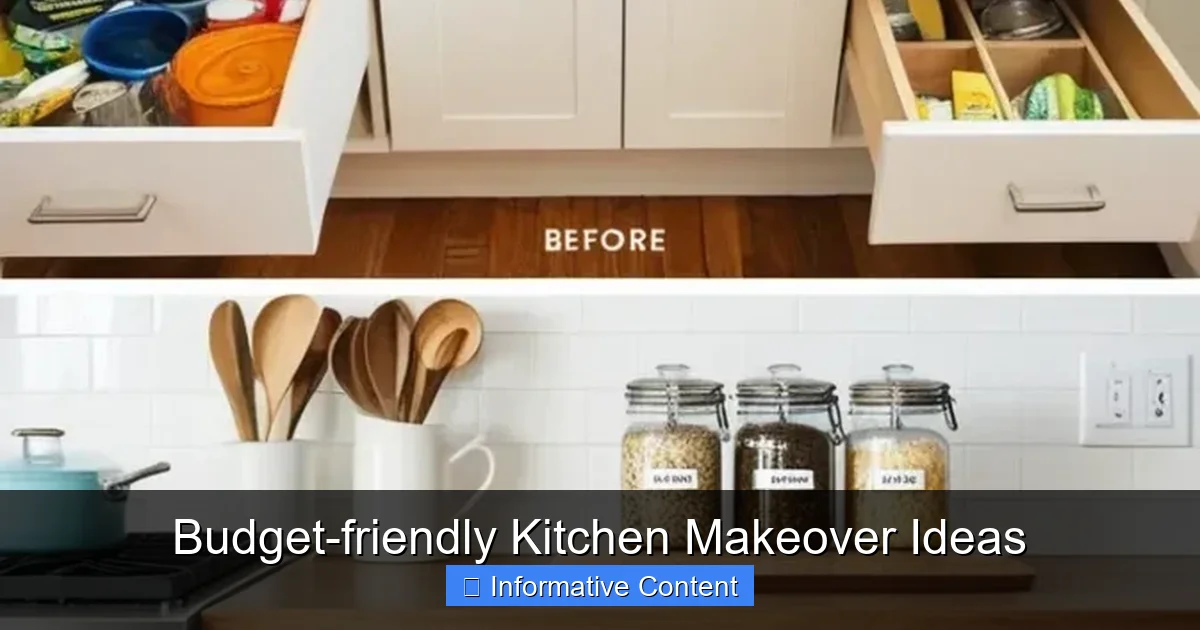
- Declutter and organize: Smart storage solutions like drawer dividers and shelf risers make your kitchen feel bigger and more functional.
- Refresh small details: New faucets, outlet covers, and switch plates are inexpensive but impactful upgrades.
- DIY where possible: Tackling projects yourself saves labor costs and gives you full creative control over your kitchen’s new look.
Quick Answers to Common Questions
Can I really remodel my kitchen for under $500?
Yes! With smart choices like paint, peel-and-stick tiles, and DIY upgrades, you can achieve a stylish makeover for under $500. Focus on high-impact, low-cost changes like hardware, lighting, and organization.
Are peel-and-stick tiles durable?
Yes, modern peel-and-stick tiles are designed to be waterproof, heat-resistant, and long-lasting. They’re perfect for backsplashes and can last several years with proper care.
Do I need to prime cabinets before painting?
Yes, priming is essential for good adhesion and a smooth finish. Use a bonding primer made for cabinets, especially if you’re painting over glossy surfaces.
Can I install under-cabinet lighting myself?
Absolutely! Most LED strip lights come with adhesive backing and simple instructions. Just measure, clean the surface, and stick them on. No wiring needed for battery or plug-in models.
What’s the easiest way to update cabinet hardware?
Simply unscrew the old knobs and pulls, then screw in the new ones. Make sure the hole spacing matches. If not, you may need to fill old holes and drill new ones—but most standard sizes are compatible.
📑 Table of Contents
- 1. Start with a Fresh Coat of Paint
- 2. Upgrade Cabinet Hardware and Fixtures
- 3. Install a Stylish Backsplash with Peel-and-Stick Tiles
- 4. Improve Lighting for Function and Ambiance
- 5. Maximize Storage and Declutter
- 6. Refresh Small Details for Big Impact
- 7. DIY vs. Hiring Help: When to Save and When to Spend
- Conclusion
1. Start with a Fresh Coat of Paint
One of the most effective and affordable ways to refresh your kitchen is with paint. It’s amazing how much a new color can change the mood and feel of a room. Whether you’re painting cabinets, walls, or even the ceiling, this simple upgrade can make your kitchen look brand new.
Paint Your Cabinets for a Major Upgrade
If your cabinets are outdated but structurally sound, painting them is a game-changer. White is always a safe bet—it brightens the space and makes it feel larger. But don’t be afraid to go bold. Deep navy, forest green, or even a soft sage can add personality and sophistication. For a modern twist, consider two-tone cabinets: paint the upper cabinets one color and the lowers another. This creates visual interest without overwhelming the space.
Before you start, clean the cabinets thoroughly and lightly sand them to help the paint adhere. Use a high-quality primer and a durable paint designed for cabinets, like Benjamin Moore Advance or Sherwin-Williams ProClassic. A foam roller gives the smoothest finish. Expect to spend around $50–$100 on supplies, depending on the size of your kitchen.
Refresh Walls and Ceilings
If your cabinets are already in good shape, consider painting the walls. A light, neutral tone like warm white, soft gray, or creamy beige can make the room feel airy and clean. For a trendy look, try an accent wall behind the stove or sink. Use a washable, semi-gloss paint in high-moisture areas to resist stains and grease.
Don’t forget the ceiling! A fresh coat of white paint can make the room feel taller and brighter. It’s a small detail that often gets overlooked but makes a surprising difference.
Try Chalkboard or Magnetic Paint
For a fun, functional twist, consider chalkboard paint on a small section of wall—perfect for jotting down grocery lists or recipes. Magnetic paint is another clever option, especially if you have kids. Paint a strip behind the fridge or near the pantry, and use it to display photos, notes, or spice jars with magnetic bases.
2. Upgrade Cabinet Hardware and Fixtures
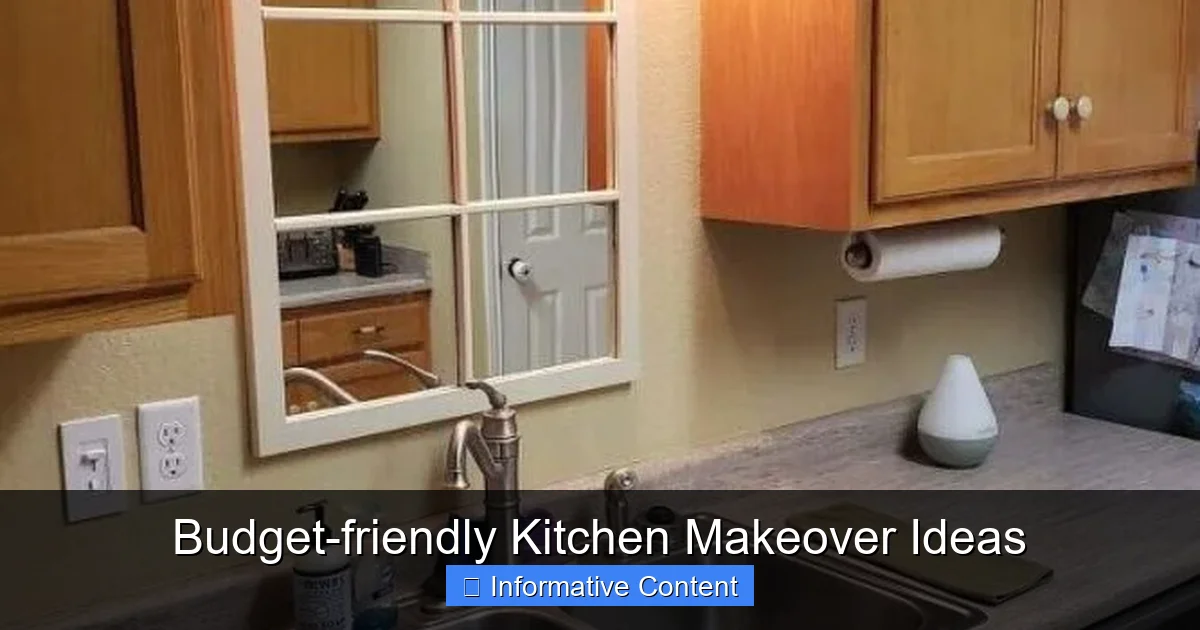
Visual guide about Budget-friendly Kitchen Makeover Ideas
Image source: i.pinimg.com
Cabinet hardware might seem like a small detail, but it’s one of the easiest and most cost-effective ways to modernize your kitchen. Old, tarnished knobs and pulls can make even the nicest cabinets look dated. Swapping them out takes less than an hour and costs as little as $2–$5 per piece.
Choose a Cohesive Finish
Pick a finish that complements your kitchen’s style. Brushed nickel and chrome are classic and versatile. Matte black is trendy and adds contrast, especially against white or light wood cabinets. For a touch of warmth, try brass or brushed gold—these finishes are having a major moment right now.
Make sure all your hardware matches. Mixing finishes can look messy unless done intentionally (like pairing black pulls with gold hinges). Measure your existing holes to ensure new hardware fits—most standard sizes are 3.75 inches apart.
Don’t Forget the Faucet
Your kitchen faucet is used multiple times a day, so upgrading it can improve both function and style. Look for a pull-down or pull-out sprayer for added convenience. A sleek, modern faucet in a matching finish to your hardware creates a cohesive look. You can find stylish options for under $100 at stores like Home Depot, Lowe’s, or online retailers like Amazon.
Installation is usually straightforward—most faucets come with detailed instructions and all necessary parts. If you’re unsure, watch a quick YouTube tutorial. The whole process takes about 30 minutes.
Update Outlet Covers and Switch Plates
This is such a tiny detail, but it makes a big difference. Replace old, yellowed plastic outlet covers with modern ones in white, stainless steel, or even decorative designs. You can find stylish options for under $10. If you’re feeling creative, paint the switch plates to match your walls or add a pop of color.
3. Install a Stylish Backsplash with Peel-and-Stick Tiles
A backsplash protects your walls from splatters and adds a huge design element to your kitchen. But traditional tile installation can be expensive and time-consuming. Enter peel-and-stick tiles—your new best friend for a budget-friendly makeover.
Why Peel-and-Stick Tiles Work
These adhesive tiles come in a variety of materials, including vinyl, metal, and even realistic-looking ceramic or stone. They’re waterproof, easy to clean, and can be installed in under an hour. Best of all, they’re renter-friendly—just peel them off when you move out (though they often leave no residue).
Popular styles include subway tile, hexagon, and Moroccan patterns. You can even mix and match for a custom look. Brands like Smart Tiles, Art3d, and FloorPops offer high-quality options that look surprisingly real.
Installation Tips
Start by cleaning the wall thoroughly and letting it dry. Measure carefully and use a level to ensure straight lines. Cut tiles with a utility knife or scissors—most are easy to trim. Work in small sections, pressing firmly to avoid air bubbles. For outlets, carefully cut around them with a craft knife.
The total cost? Usually under $50 for a standard kitchen backsplash. Compare that to $500+ for professional tile installation, and it’s a no-brainer.
Alternative: Paint a Backsplash
If you’re not ready for tiles, consider painting a backsplash area. Use a bold color or a geometric pattern with painter’s tape. A chevron or herringbone design can look surprisingly chic. Seal it with a clear, wipeable topcoat to protect against grease and moisture.
4. Improve Lighting for Function and Ambiance
Good lighting can make or break a kitchen. Harsh overhead lights create shadows and make the space feel cold. Layered lighting—combining ambient, task, and accent lighting—creates a warm, functional environment.
Add Under-Cabinet Lighting
Under-cabinet lighting illuminates your countertops, making food prep easier and safer. LED strip lights are affordable, energy-efficient, and easy to install. Stick them to the underside of upper cabinets using adhesive backing. Many come with remote controls or motion sensors.
You can find a 6-foot LED strip for under $30. Choose warm white (2700K–3000K) for a cozy feel or cool white (4000K) for a crisp, modern look.
Upgrade Pendant Lights
Pendant lights over an island or sink add style and focused light. Look for budget-friendly options at IKEA, Target, or Wayfair. A pair of matching pendants can cost as little as $60–$100. Choose a design that complements your hardware and overall style—industrial, farmhouse, or minimalist.
If you’re replacing existing fixtures, turn off the power at the breaker and follow the manufacturer’s instructions. Most pendant lights come with all the hardware you need.
Use Dimmers for Mood Control
Install dimmer switches to control the brightness of your overhead lights. This lets you adjust the mood—bright for cooking, soft for dinner parties. Dimmer switches are inexpensive (around $15–$25) and easy to install with basic tools.
5. Maximize Storage and Declutter
A cluttered kitchen feels smaller and less inviting. Smart storage solutions can make your space more functional and visually appealing—without spending a fortune.
Use Shelf Risers and Dividers
Shelf risers double your cabinet space by creating a second level for plates, bowls, or spices. They’re especially useful in deep cabinets. Drawer dividers keep utensils, cutlery, and gadgets organized. You can find both at dollar stores or online for under $10.
Install Pull-Out Pantry Bins
If you have a narrow pantry or cabinet, add pull-out bins or baskets. These make it easy to see and reach items at the back. Look for slide-out organizers that fit your cabinet dimensions. Many are adjustable and cost under $30.
Hang Hooks and Racks
Free up counter space by hanging pots, pans, and utensils. Install a wall-mounted pot rack or use adhesive hooks for towels and aprons. Magnetic knife strips keep blades handy and safe. These solutions are stylish and functional.
Clear the Counters
The fewer items on your counters, the bigger your kitchen feels. Store small appliances like toasters and blenders in cabinets when not in use. Use decorative baskets or trays to corral essentials like fruit, mail, or spices.
6. Refresh Small Details for Big Impact
Sometimes, the smallest changes make the biggest difference. Focus on the details that people notice—like outlet covers, switch plates, and even the inside of cabinets.
Line Cabinets and Drawers
Add adhesive liner to the bottom of cabinets and drawers. It protects surfaces, reduces noise, and gives a finished look. Choose a pattern that complements your style—floral, geometric, or solid color. It’s an easy $10 upgrade.
Update Cabinet Interiors
If your cabinet interiors are stained or damaged, clean them thoroughly and consider painting or lining them. A fresh coat of white paint inside cabinets makes them look brand new.
Add a Rug or Runner
A kitchen rug adds warmth and comfort underfoot. Choose a washable, non-slip option in a pattern or color that ties the room together. Look for durable materials like cotton or polypropylene.
Display Fresh Herbs or Plants
A small herb garden on the windowsill or a potted plant on the counter brings life to your kitchen. Herbs like basil, mint, and rosemary are easy to grow and useful for cooking. Plus, they smell amazing.
7. DIY vs. Hiring Help: When to Save and When to Spend
One of the biggest advantages of a budget-friendly makeover is the ability to do most of the work yourself. But knowing when to hire a pro can save you time, stress, and money in the long run.
DIY Projects to Tackle Yourself
– Painting cabinets, walls, or ceilings
– Installing peel-and-stick backsplash
– Replacing hardware and faucets
– Adding under-cabinet lighting
– Organizing and decluttering
These projects require basic tools and a little patience. Watch tutorials, read instructions, and take your time. The satisfaction of doing it yourself is worth it.
When to Call a Professional
– Electrical work (beyond simple switch replacements)
– Plumbing (if you’re not confident with pipes)
– Structural changes (like removing walls)
– Gas line adjustments
If a project feels overwhelming or unsafe, don’t hesitate to hire a licensed professional. It’s better to spend a little more than risk damage or injury.
Conclusion
A budget-friendly kitchen makeover doesn’t mean sacrificing style or quality. With smart choices and a little creativity, you can transform your kitchen into a space that’s both beautiful and functional—all without draining your wallet. From a fresh coat of paint to stylish peel-and-stick tiles, the upgrades we’ve covered are accessible, affordable, and achievable for almost anyone.
Remember, the goal isn’t perfection—it’s progress. Start small. Pick one or two projects that excite you and tackle them this weekend. You’ll be amazed at how much better your kitchen feels. And as you go, you’ll gain confidence to take on bigger challenges.
Your kitchen should be a place you love to spend time in. Whether you’re cooking a family meal, hosting friends, or just enjoying your morning coffee, a refreshed space can make all the difference. So grab a paintbrush, some new hardware, and get started. Your dream kitchen is closer than you think—and it doesn’t have to cost a fortune.
Frequently Asked Questions
How much does a budget kitchen makeover typically cost?
A budget-friendly kitchen makeover can cost anywhere from $200 to $800, depending on the scope. Most homeowners spend around $500 by focusing on paint, hardware, lighting, and DIY installations.
Can I paint laminate cabinets?
Yes, but they require extra prep. Clean thoroughly, lightly sand, and use a bonding primer designed for laminate. Chalk paint or cabinet-specific paint works best for a durable finish.
Are peel-and-stick tiles safe near the stove?
Most are heat-resistant up to 175°F, but avoid placing them directly behind a gas flame. Install them at least 6 inches away from the burner for safety.
What’s the best paint finish for kitchen cabinets?
Semi-gloss or satin finishes are ideal—they’re durable, easy to clean, and resist moisture and grease. Avoid flat paints, which are harder to wipe down.
How do I make my small kitchen look bigger?
Use light colors, maximize natural light, install under-cabinet lighting, and keep counters clutter-free. Mirrored backsplashes or glass cabinet doors can also create the illusion of space.
Can I update my kitchen if I’m renting?
Absolutely! Focus on renter-friendly upgrades like peel-and-stick tiles, removable wallpaper, adhesive hooks, and new hardware (store the originals to reinstall when you move out).